Navigation
Evervideo offers a clean, intuitive interface that feels familiar to anyone who has used a music or media player on iOS — but adds a true built-in file manager so you can edit, rename, move, and organize video files in cloud storage and on your device without leaving the app.
Unlike most media apps, Evervideo merges your cloud accounts, NAS shares, media servers, and local files into a single, unified Files tab — so you don’t bounce between separate screens. That makes moving a video from a Plex server, to an iCloud Drive folder, to your iPhone’s Documents folder a one-screen, one-tap operation.
Tabs
Whether you’re using an iPhone, iPad, or the compact window mode on a Mac, all app features are reachable from the tab bar at the bottom of the screen. On iPad and Mac, the same menu is available on the left sidebar so you can keep more of the screen for video content.
- Recents — Evervideo opens here by default. A list of every video you’ve recently watched, with thumbnail and per-file watch progress, so you can resume any of them with one tap.
- Favorites — every video and folder you’ve marked as a favorite, with quick More Actions on each item.
- Media Library — your media library, grouped by Albums, Genres, Playlists, Recents, and Favorites. You can also browse videos from the Photos library (All Videos, Short, Medium, Long, Screen Recordings, and your Photo Albums) and the Music library (Albums, Genres, Playlists).
- Playlists — manage every video playlist in one place: create, rename, edit cover art, reorder, enable offline mode, import M3U / M3U8 / CUE files, and export to M3U / CSV / TXT.
- Files — the all-in-one file manager. The Files tab combines what most apps would split into “Connections” and “Local Files”: cloud storage (Google Drive, Dropbox, OneDrive, iCloud Drive, MEGA, Box, pCloud, Yandex Disk, and many more), NAS shares over SMB / WebDAV / FTP / SFTP / NFS / DLNA, self-hosted media servers (Plex, Jellyfin, Emby, Subsonic, Navidrome), RTSP IP-camera streams, S3-compatible object storage, your Documents folder, files on this iPhone / iPad / Mac, the transfers queue, and the Available Devices section. A spinning-arrows Transfers icon in the top-left corner gives instant access to active downloads and uploads.
- Settings — change application settings: media player (Picture-in-Picture, hardware decoder, video equalizer, video scaling, rotation), audio (equalizer, sample rate, channels, IO buffer), subtitles (primary / secondary track, font, external file), media library, file manager, Home Screen widgets, personalization, language, passcode, and backup & restore.
- Quick Access — sits at the top of the Files and Media Library screens for fast access to recents and favorites in each context.
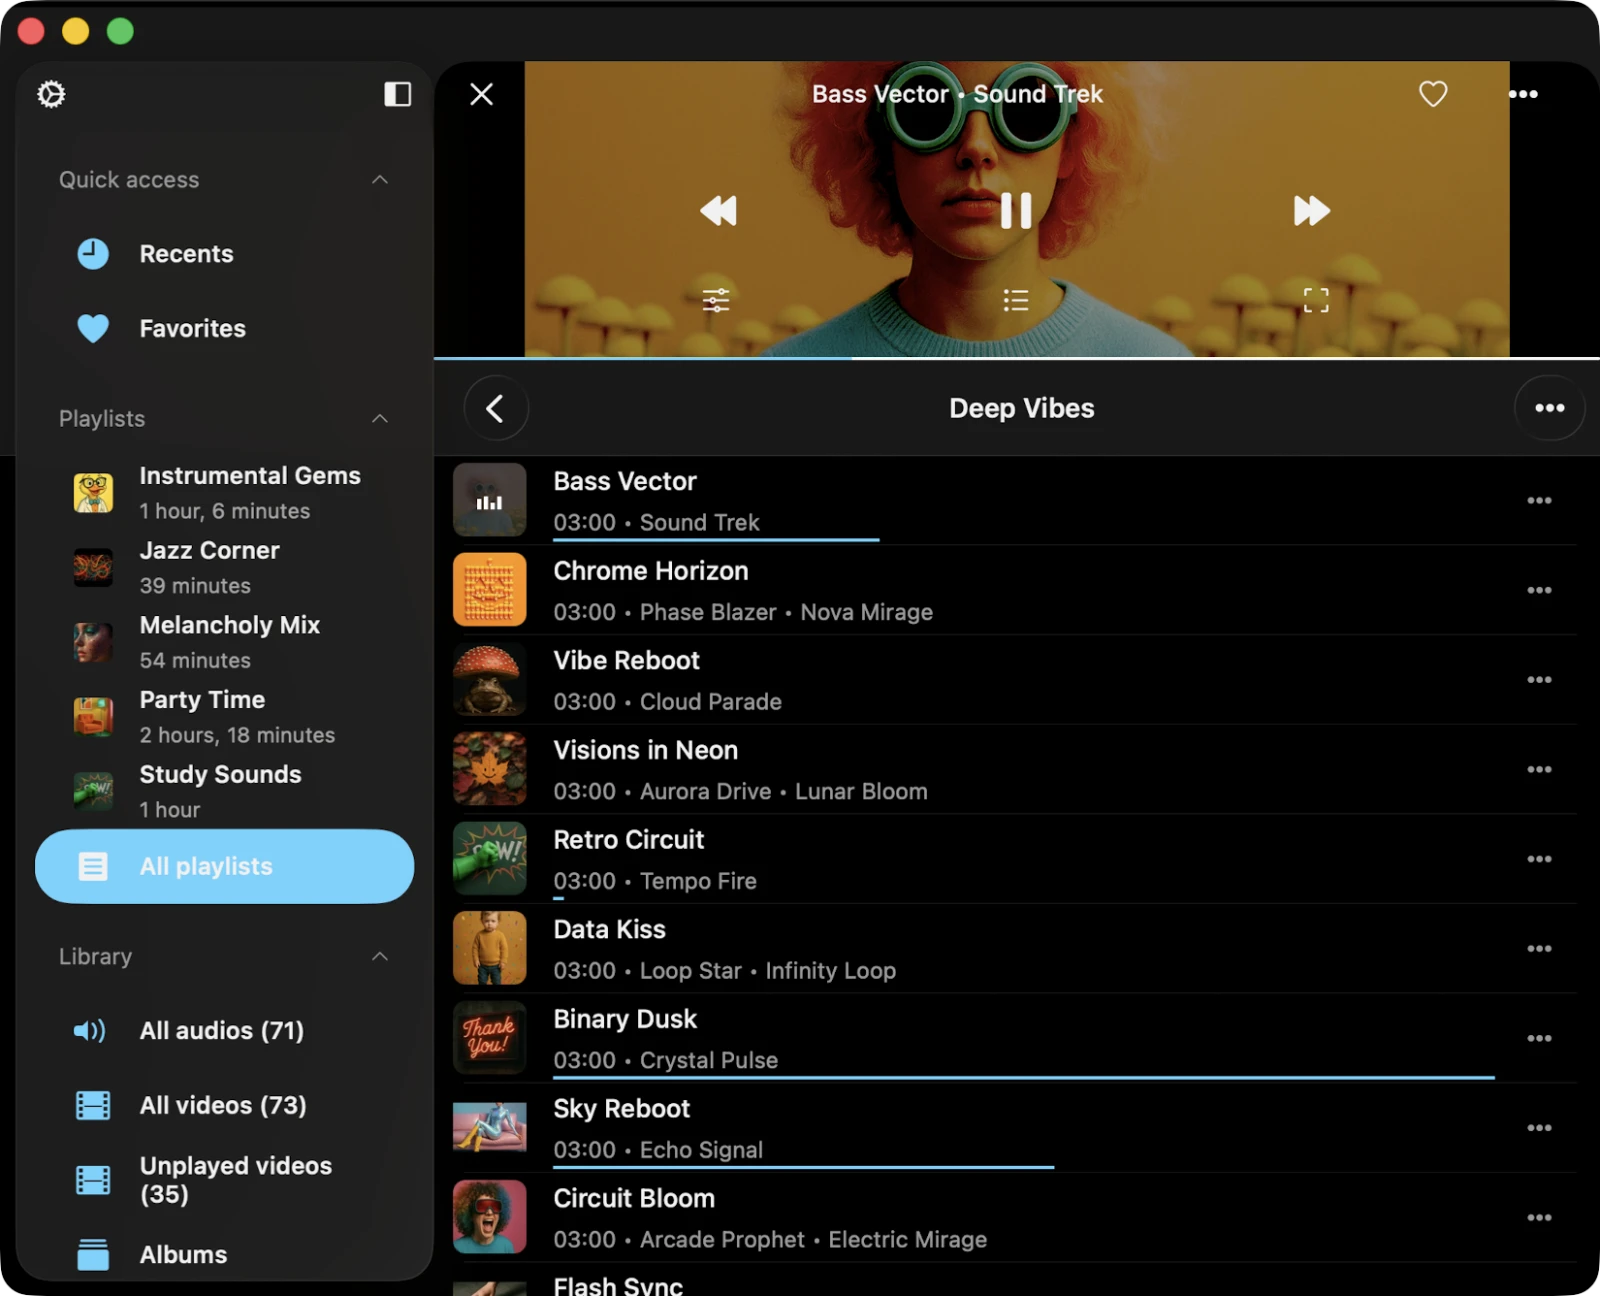
The Compact Media Player
Evervideo includes a unique compact media player that stays visible at the top of the app while you browse your library, your file manager, your settings, or any other tab. Tap the compact player to expand it into the full-screen media player; tap and swipe down on the full-screen player to collapse it back to the compact view without stopping playback.
This means you can keep watching a video while you browse the library for what to play next, manage downloads, or adjust app settings — without ever stopping playback or losing your place.
On macOS, the compact player can also be detached as a separate floating mini-player window so it stays on top of every other app you’re using — perfect for tutorials, lectures, or having a movie on the side while you work.
Picture-in-Picture (PiP)
On iPhone and iPad, Evervideo fully supports Picture-in-Picture (PiP), so when you switch to another app, the video continues playing in a movable floating window. Tap the PiP icon on the full-screen player to enter PiP mode manually; drag the floating window to any corner; pinch to resize; tap once to bring up basic play / pause / skip controls; and tap the small expand button to return to the full Evervideo app.
PiP works with all video formats Evervideo plays, including cloud-streamed files and RTSP streams, and continues running while your phone is locked.
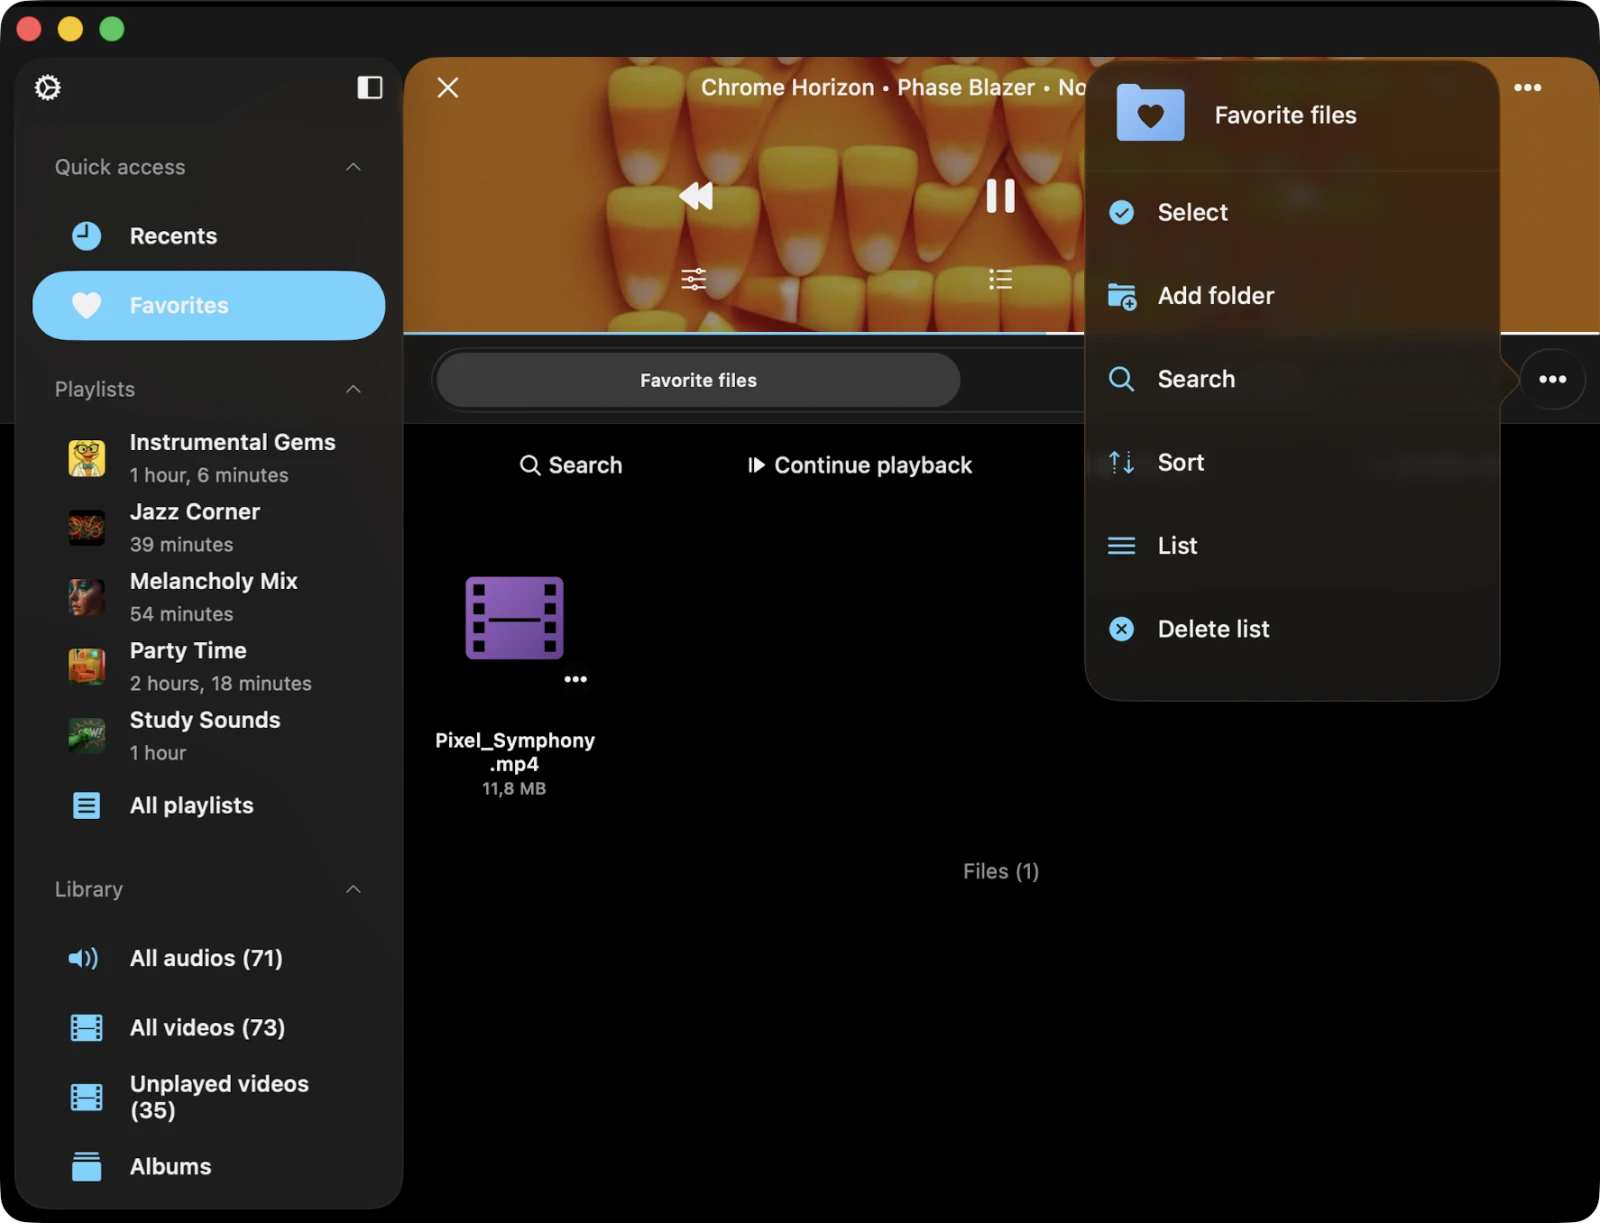
More Actions
Virtually every content item on the screen has a More Actions button (the “⋯” three-dots icon). Tap it to open a context-sensitive menu with every action available for that item — play next, play later, add to playlist, add to favorites, edit tags, download, share, rename, move, and so on. Long lists scroll vertically so you can reach less-common actions without crowding the main UI.
Top Toolbar
The top toolbar, situated just beneath the navigation bar, provides quick access to the most common per-screen actions. You can show or hide it with a simple swipe-down gesture.
- Search — start a search within the current screen (folder, playlist, album, genre, library, or queue).
- Continue Playback — Evervideo can restore the player state and last position for the current directory, album, genre, or playlist. This option appears when Save Audio / Media Player State is enabled in settings.
- Play All — adds every video from the current page to the player queue, preserving the current sort order.
- Shuffle All — adds every video from the current page to the player queue, shuffled. Great for rediscovering a long-forgotten album of clips.
Context Menu
The context menu provides quick access to additional options and actions for seamless interaction across devices.
Context Menu on iOS / iPadOS
Tap and Hold on cells, the compact player, or any thumbnail to reveal the context menu. You can change the context menu presentation style in Settings → Personalization → Context Menu Style.
Context Menu on macOS
Right-click on cells, the compact player, or video thumbnails to show the context menu. Right-click also works on the now-playing video in the full-screen player.
Home Screen Widgets
Evervideo supports widgets on iPhone, iPad, and Mac so you can see the now-playing video at a glance and resume playback with a single tap.
First, enable widgets in the app:
- Open Settings → Widgets → Enable Widgets (widget updates use a small amount of energy, so the toggle is off by default).
Then add the widget on your device:
On iPhone or iPad
- Long-press an empty area of your Home Screen or Lock Screen.
- Tap the + button in the top corner and search for Evervideo.
- Pick a widget size and tap Add Widget.
On Mac
- Click the date and time in the menu bar to open Notification Center, then click Edit Widgets at the bottom. (You can also Control-click the desktop and choose Edit Widgets to place one directly on your desktop.)
- Search for Evervideo in the widget gallery.
- Click a widget size, or drag it to Notification Center or the desktop.
The widget shows the current video’s title, thumbnail, and basic controls on every platform.
Accessibility
Evervideo is fully accessible with VoiceOver: every component has a descriptive label and a sensible accessibility hint. When VoiceOver is active, the app automatically switches to Text Mode — image-heavy decorative elements are hidden and only meaningful controls are surfaced, improving navigation speed and clarity for screen-reader users. You can also enable Text Mode manually in Settings → Accessibility → Text Mode.
Adjusting Sliders with VoiceOver
- Select the slider — swipe left or right until VoiceOver announces it.
- Adjust the value — double-tap and hold the slider, then drag up or down to change the value quickly. VoiceOver announces each new value as you go.
Adjusting Track Position in a Playlist with VoiceOver
- Open a playlist and tap the More button.
- Select Rearrange Songs. The list switches into editing mode.
- Tap the reorder indicator icon near the track title to give it focus.
- Double-tap the reorder indicator. On the second tap, do not release your finger — hold it until you hear a sound indicating the cell is ready to be moved.
- You can now move the cell to its new position.
Other components work as expected, using system-provided VoiceOver patterns.