Files
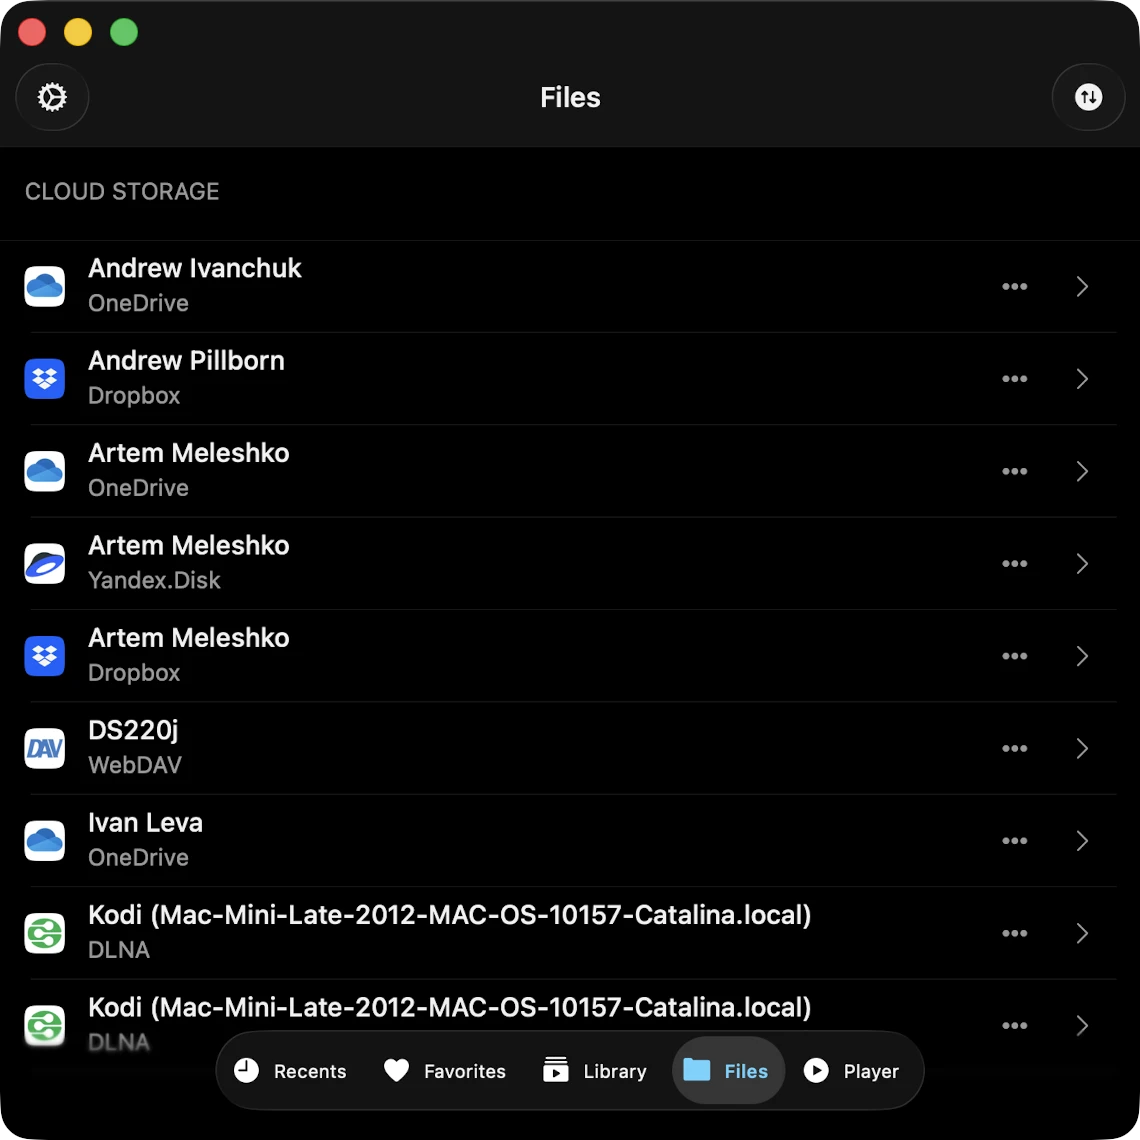
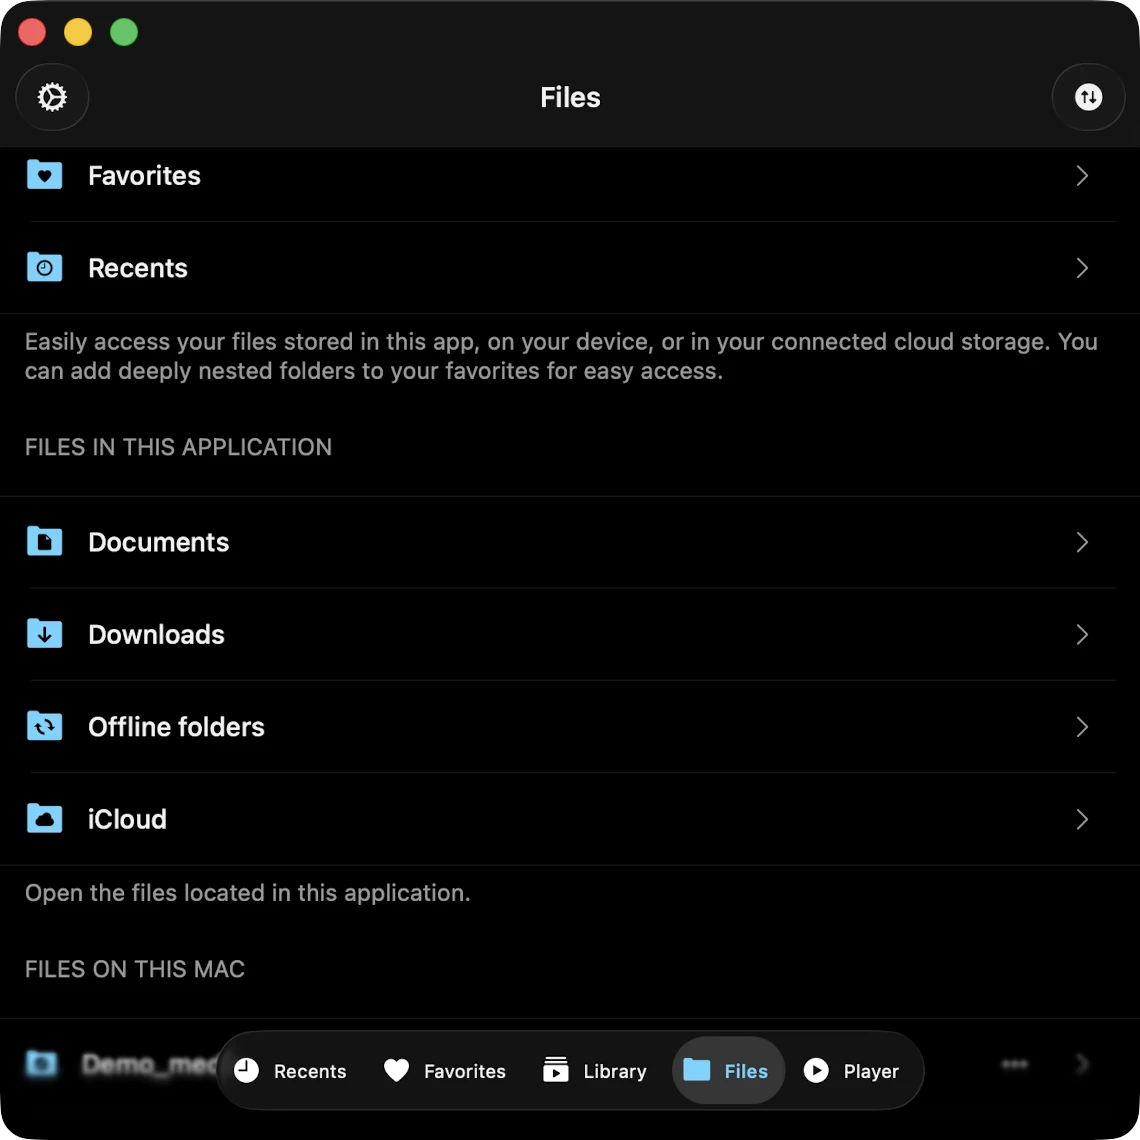
The Files tab is Evervideo’s all-in-one file manager. Unlike most video apps that split cloud storage from local files into different tabs, Evervideo merges both into a single, scrollable screen so you can move from a Plex server to a cloud folder to your iPhone’s Documents folder without bouncing between tabs.
The Files tab is split into clear sections that appear in this order on your screen:
- Quick Access — recents and favorites for files and folders you opened most recently.
- Files in This Application — what lives in Evervideo’s sandboxed Documents folder.
- Files on This iPhone / iPad / Mac — videos elsewhere on your device, surfaced through the system file picker.
- Cloud Storage — every cloud account, NAS, and media server you have connected.
- Available Devices — Bonjour / mDNS auto-discovered servers and drives on your local network.
In the top-right corner of the Files screen is a Transfers button (a spinning-arrows icon). Tap it to open the Transfers Queue where you monitor every download and upload across all of your sources.
Connect to Cloud Storage
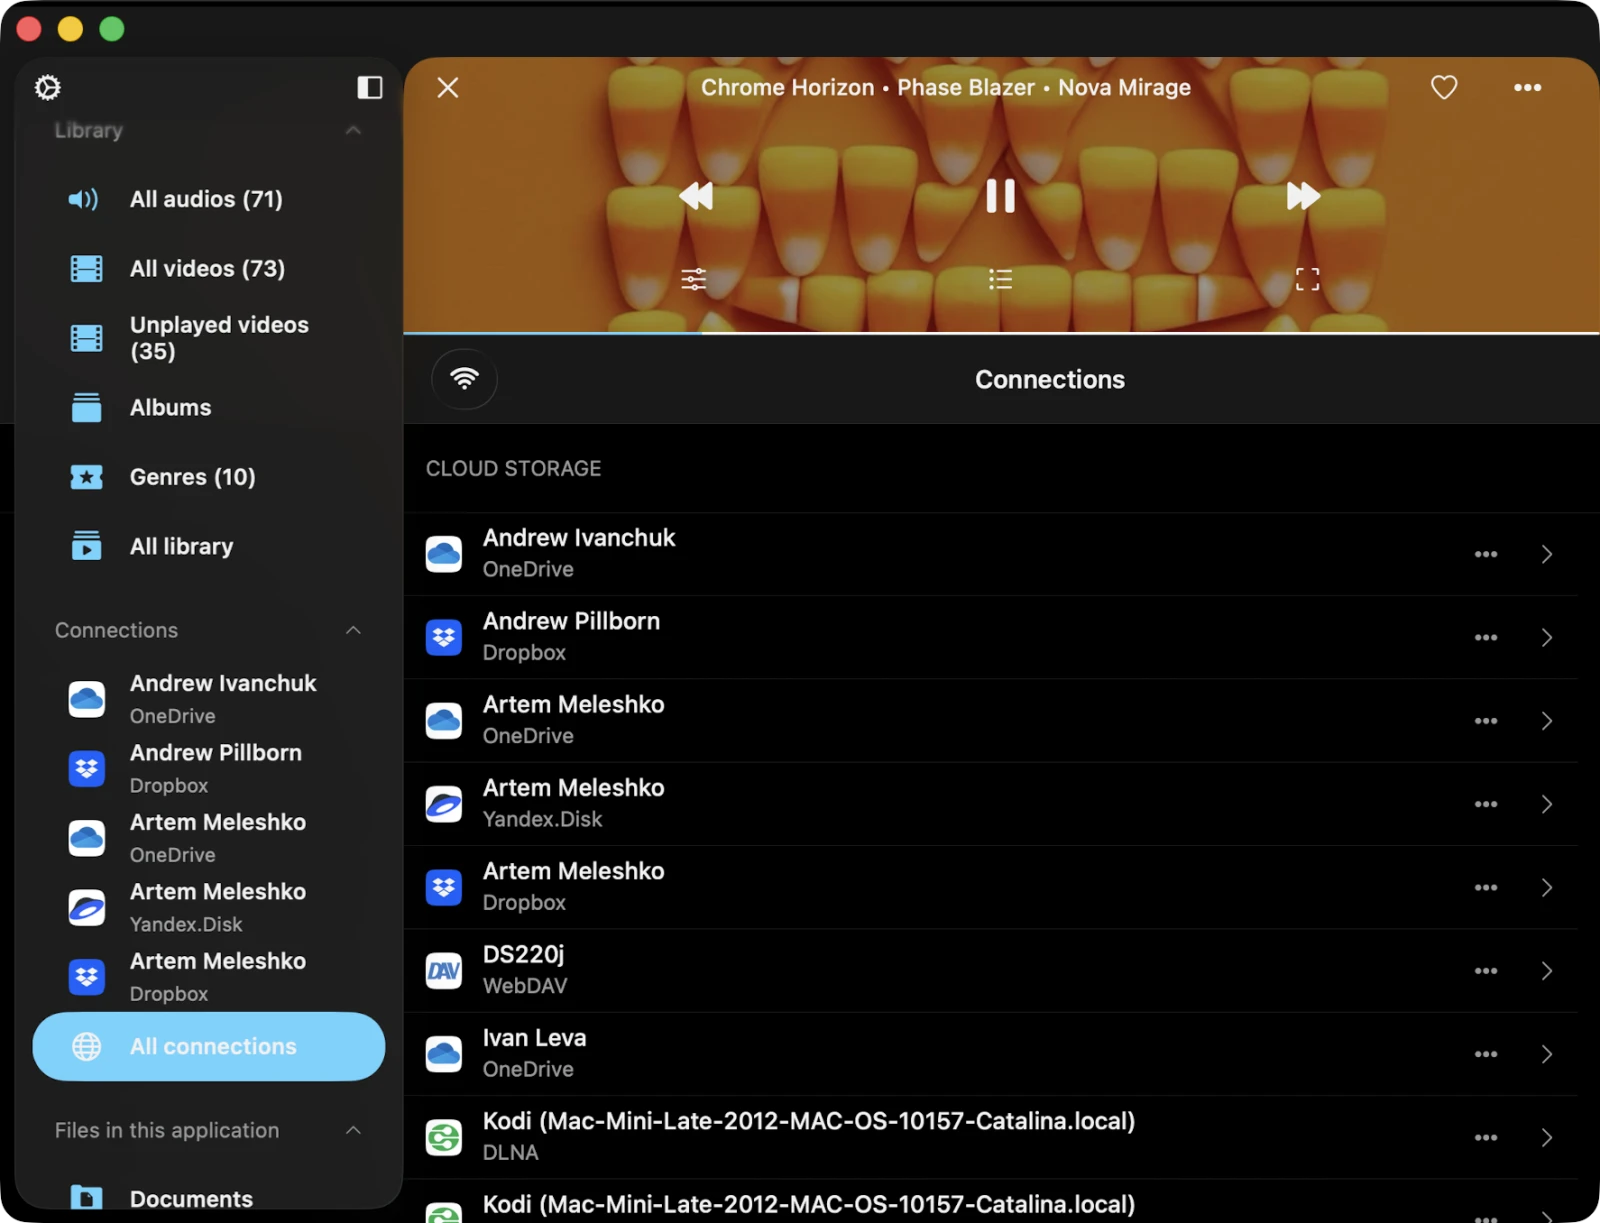
The Cloud Storage section of the Files tab is where every connected account, NAS, media server, and stream lives — side by side, in one scrollable list.
- Open the Files tab.
- Scroll to the Cloud Storage section.
- Tap Connect to cloud storage from the menu.
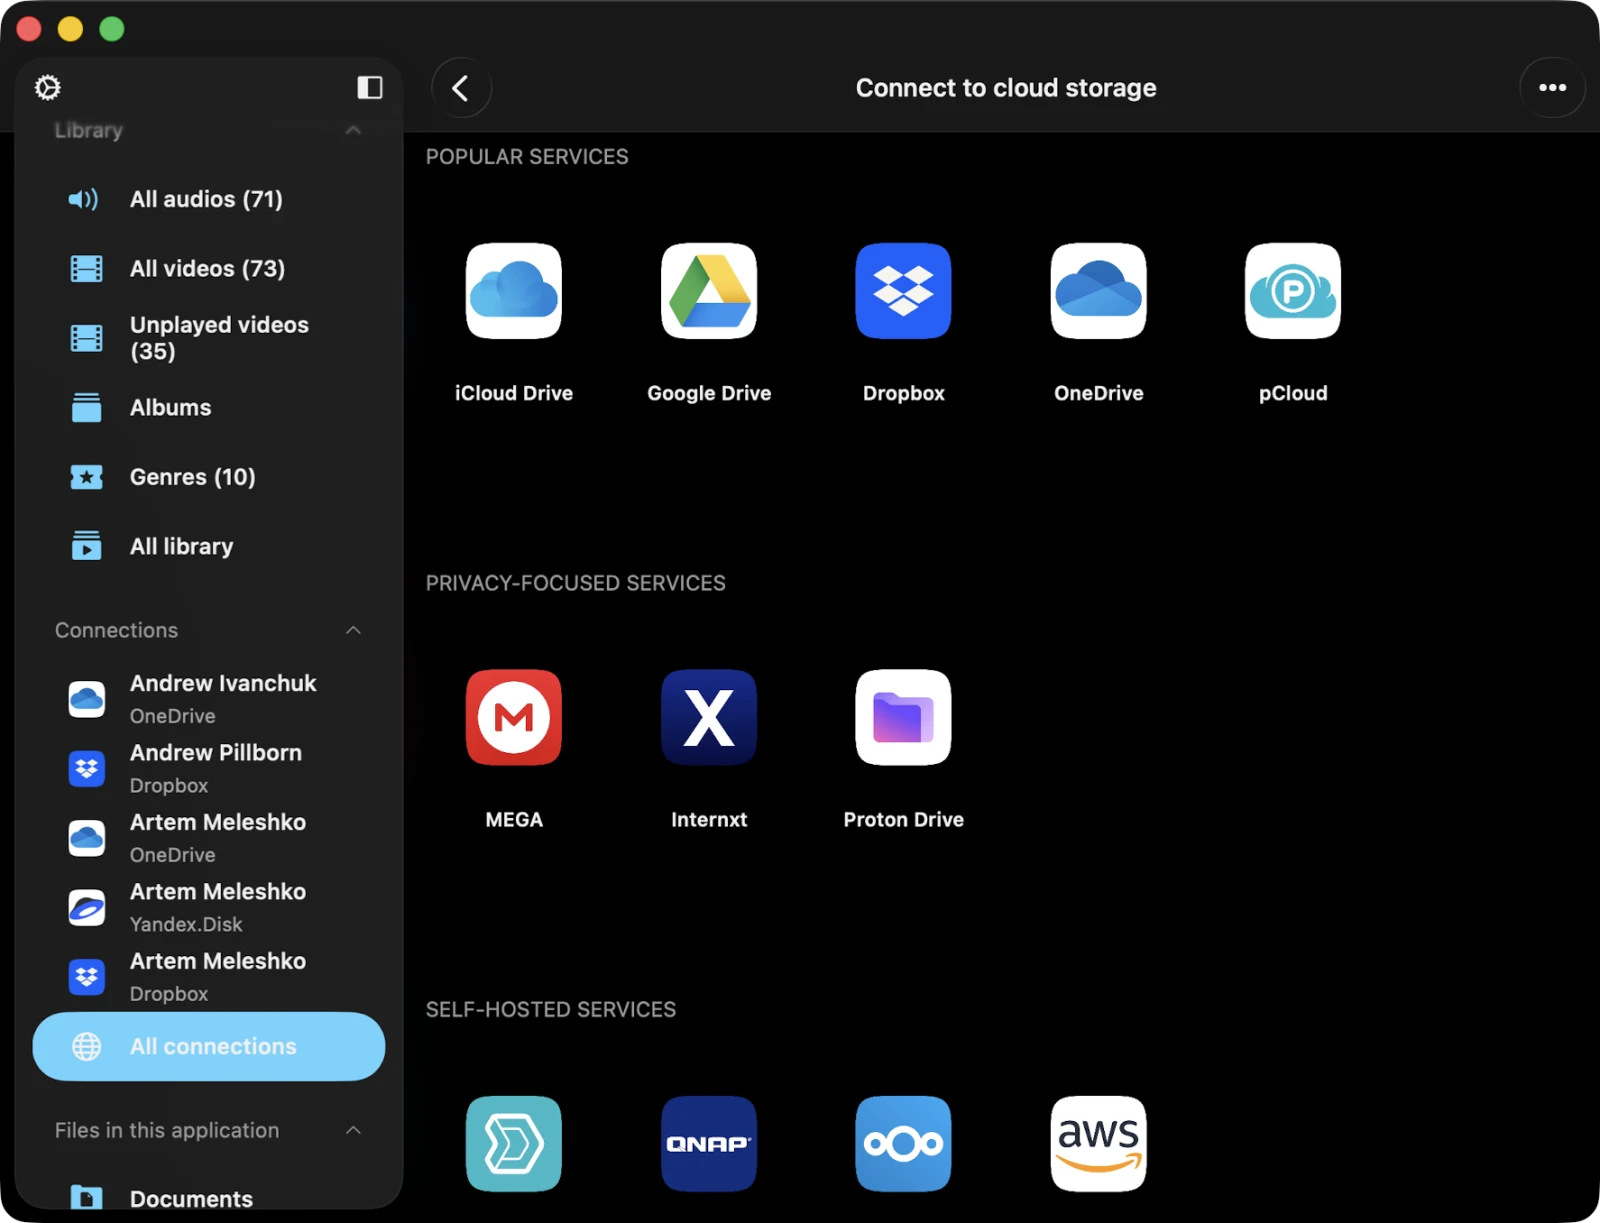
- Choose a cloud storage service from the list.
- Enter your credentials on the official authorization page provided by the cloud provider, then tap Done.
If you encounter any issues, check your internet connection and your login / password. In the Premium version of the app, you can add an unlimited number of services; the free version supports up to three.
Supported Cloud Storage Services, Media Servers, and Protocols
Evervideo supports an exceptionally wide range of sources for your videos. Everything below works from a single Connect to cloud storage flow.
Personal cloud storage: iCloud Drive · Dropbox · OneDrive · Google Drive · MEGA · Box · pCloud · Yandex Disk · WD My Cloud Home · MediaFire · TeraCLOUD (InfiniCLOUD) · HiDrive · IceDrive · Koofr · OpenDrive · MyDrive · Put.io · Cloud Mail.ru · Internxt · Proton Drive · AliDrive (阿里云盘) · Baidu Pan (百度网盘).
Self-hosted media servers: Plex · Jellyfin · Emby · Subsonic (and every Subsonic-compatible server — Airsonic, Funkwhale, Gonic, Ampache) · Navidrome · Nextcloud (and ownCloud via the shared API) · Synology Drive · QNAP.
NAS and file-share protocols: SMB (SMB1, SMB2, Auto) · WebDAV (HTTP / HTTPS) · FTP · FTPS · SFTP (SSH File Transfer Protocol, password or public-key auth) · NFS · DLNA / UPnP (playback and download).
Live and IP-camera streams: RTSP — point Evervideo at any rtsp:// URL and it just plays. Great for security cameras, IPTV streams, doorbell cameras, baby monitors, and similar live sources.
S3-compatible object storage: AWS S3, Backblaze B2, Wasabi, Cloudflare R2, MinIO, DigitalOcean Spaces, and any other S3-API endpoint.
On-device libraries: the Photos library (all videos, screen recordings, photo albums) and the Music app library (Albums, Genres, Playlists) — both surface inside the Media Library so you don’t have to copy anything.
Local-network discovery: the Available Devices section auto-lists every Bonjour / mDNS service on your Wi-Fi network — Plex, Jellyfin, Emby servers, Synology, QNAP, AirPort routers with attached drives, Apple Time Capsule — so you can tap to connect without typing an IP address.
Each connection uses the official SDK or open protocol of the service, with OAuth-based authorization where supported. You can connect multiple accounts of the same service (for example, two Google Drive accounts, or both a Plex and a Jellyfin server) and browse them side-by-side in the Cloud Storage section.
Security and Privacy
Evervideo uses only official SDKs and secure connections to interact with connected cloud services. Your login and password are not accessible to the application — all transfers are TLS-encrypted.
When you enter your login and password, the application shows you the official authorization page provided by the cloud service provider, and the entire authorization process takes place outside the application. The cloud service provider then sends an auth-token to the application after successful authorization, and that token is used to make API calls.
An auth-token is a digital key that allows third-party applications to interact with cloud storage on your behalf. The token is stored on your device in Apple’s secure system storage (Keychain), which is encrypted at rest and protected by your device passcode or biometric lock. You can download files from connected cloud services to your device; those files are placed in the app’s Documents directory and can be removed at any time using the built-in file manager.
The application does not share any information from your connected cloud accounts with Everappz, advertisers, or any third party. You can revoke access to your cloud account at any time by opening the account-settings page in your web browser.
Reject Auth-Token
To revoke an auth-token, log in to your cloud account in a web browser and navigate to the security or connected-apps page. There you can find every third-party app that is connected to your cloud account and remove any of them if you no longer want to use it. Detailed instructions for Google accounts are available here.
You can also disconnect the cloud account inside the application itself — when you do, the auth-token is immediately deleted from your device. If you uninstall the application from your device, all downloaded data and access tokens are removed automatically along with it.
Disconnect a Cloud Storage or Change Configuration
- Access cloud-storage options — locate the connected service in the Cloud Storage section of the Files tab.
- Tap the “…” button next to the service title to open additional options:
- Rename — change the name of the cloud service as it appears in your list.
- Settings — modify the configuration or authentication data. Sometimes you may need to re-authorize the connected cloud service if the authorization token has expired.
- Disconnect — completely sever the connection between the app and the cloud service. This removes all videos associated with that service from your media library, but it leaves them untouched on the server.
Connect to a Computer or NAS
You can connect your computer, personal NAS, or other network device using the SMB, WebDAV, FTP / FTPS, SFTP, NFS, or DLNA protocol. This is the easiest way to bring an existing home media library — whether it lives on a Mac, Windows PC, Synology, QNAP, Apple Time Capsule, or WD My Cloud Home — into Evervideo without copying anything.
Connect to a Computer Using SMB
- Tap Connect to cloud storage → SMB.
- Enter the computer’s IP address and shared folder name using the format
smb://computer-ip-address/shared-folder-name. - Choose the protocol version: Auto, SMB1, or SMB2.
- Enter your login and password (if required).
- Tap Done.
If the connection is successful, the share appears in the Cloud Storage section. A full tutorial on how to connect your Mac or PC using SMB is available here.
Connect to a NAS Using WebDAV
All steps are the same as SMB, except for the URL field. Use http://server-name or https://server-name if the server supports SSL. WebDAV works with Synology, QNAP, Nextcloud, ownCloud, WD My Cloud Home, and any other server with a WebDAV endpoint.
A full tutorial on WebDAV is available here.
Connect via DLNA / UPnP
Share a media library located on your Windows PC or NAS using the DLNA / UPnP protocol and access it inside Evervideo as described here. DLNA is widely supported, but it only allows you to play or download videos — you cannot upload files or create new folders on a DLNA server.
Connect Using FTP, FTPS, or SFTP
Evervideo also supports the classic file-transfer protocols. To connect a server over FTP or FTPS, tap Connect to cloud storage → FTP, enter the host URL in the form ftp://server-name (or ftps://server-name for an encrypted connection), provide your login and password, then tap Done. For SFTP (SSH File Transfer Protocol), choose SFTP instead and supply either a password or an SSH key pair.
Connect to an NFS Share
Evervideo includes NFS (Network File System) support — handy for Linux hosts, BSD servers, and NAS devices that prefer to expose video libraries over NFS instead of SMB. Pick NFS in the Connect to cloud storage menu, enter the server address and exported path, and tap Done.
Connect a Plex Media Server
Evervideo can connect directly to a Plex Media Server and browse your Movies, TV Shows, and Home Videos libraries. Tap Connect to cloud storage → Plex, sign in with your Plex account, pick a server, and the library appears alongside your cloud services. Plex servers on the same local network are also discovered automatically in the Available Devices section.
Connect a Jellyfin or Emby Server
Both Jellyfin (open-source) and Emby (commercial) media servers work natively in Evervideo. Tap Connect to cloud storage → Jellyfin or Emby, enter your server URL (typically something like http://server-ip:8096) and credentials, and your library is ready to stream.
Connect a Subsonic or Navidrome Server
Evervideo speaks the Subsonic API, which means it works with Subsonic itself, Navidrome, and every other Subsonic-compatible server — including Airsonic, Funkwhale, Gonic, Logitech Media Server (LMS), and Ampache. Tap Connect to cloud storage → Subsonic, enter the server URL and credentials, and the library appears in the Cloud Storage section.
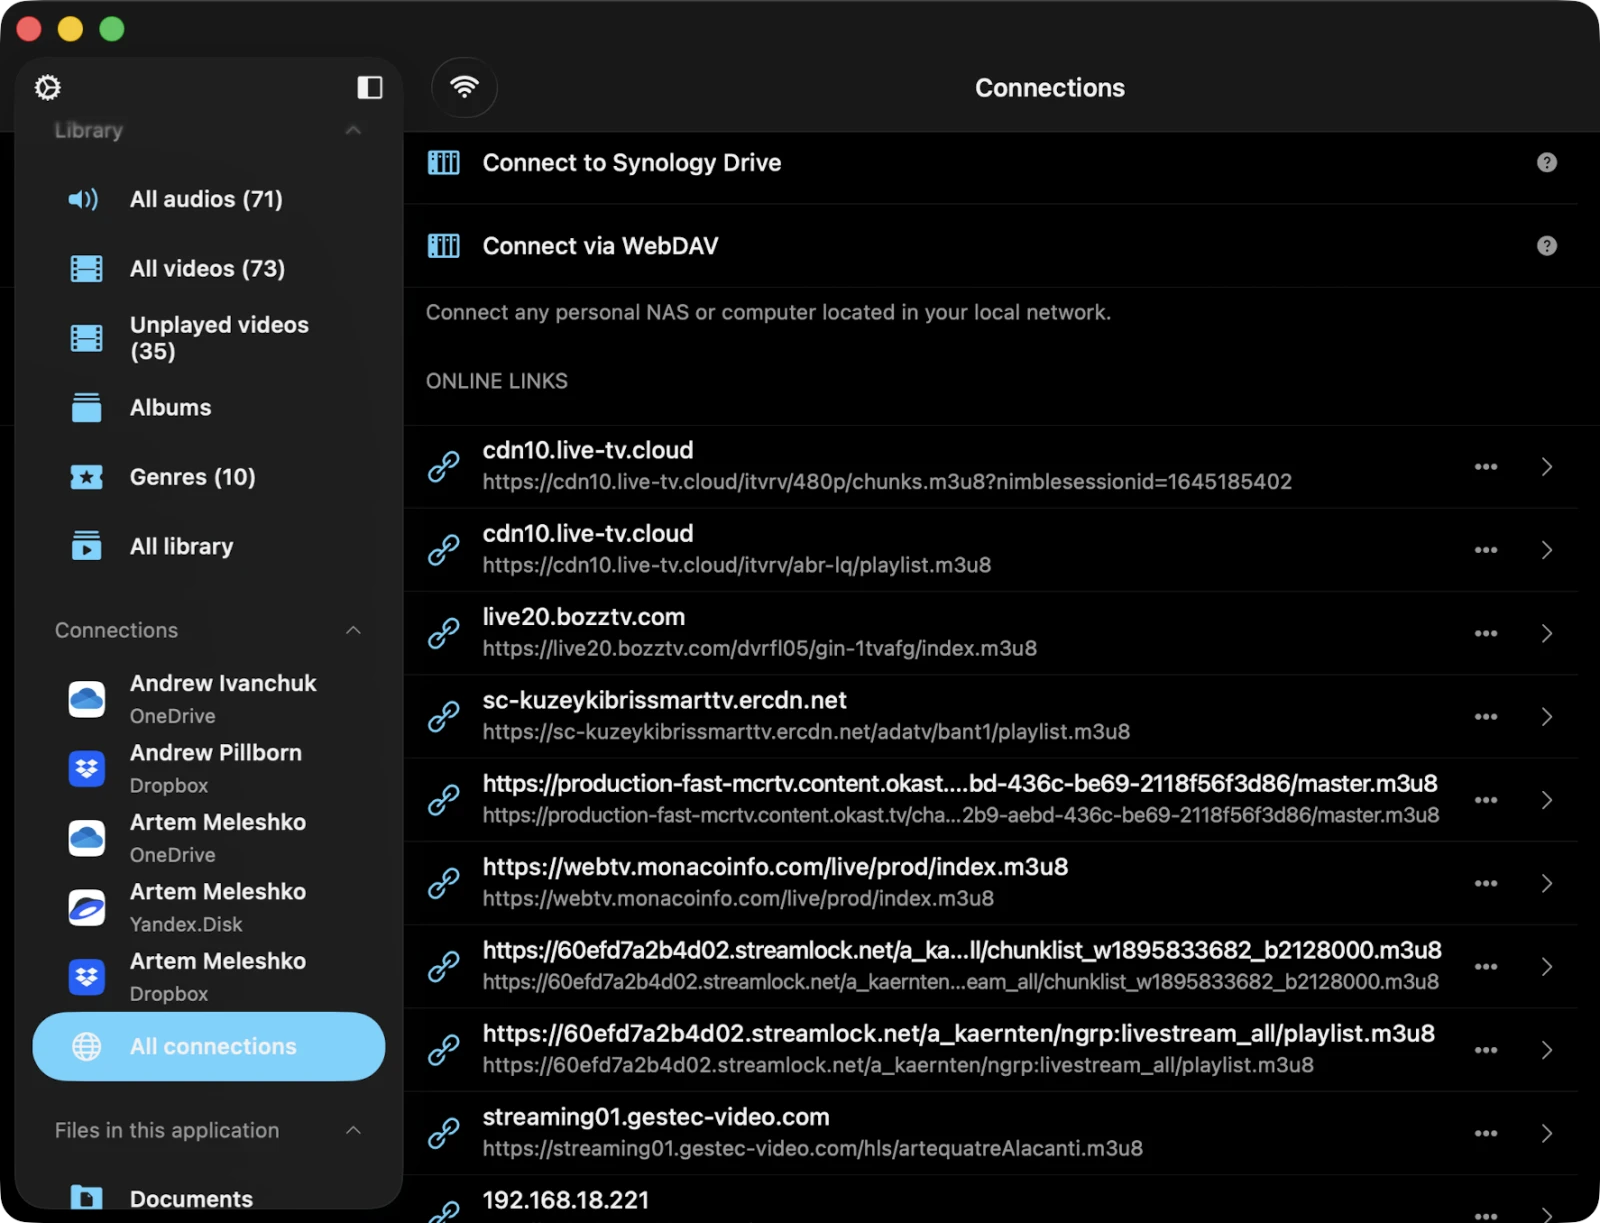
Connect an RTSP Stream (IP Cameras, Live TV, IPTV)
Evervideo has native RTSP support, so you can point it at any RTSP source — security cameras, doorbell cameras, IPTV providers, baby monitors, broadcast feeds — and Evervideo will pull and decode the stream live. Tap Online Links → Add link, paste in the full URL (rtsp://camera-ip:port/stream-path), supply login and password if required, and tap Done.
Connect to S3-Compatible Object Storage
For self-hosters and power users using cloud object storage, Evervideo includes an S3-compatible connector. Tap Connect to cloud storage → S3 storage, then enter the endpoint URL, region, access key, secret key, and bucket name. This works with AWS S3, Backblaze B2, Wasabi, Cloudflare R2, MinIO, DigitalOcean Spaces, and any other S3-API endpoint.
Available Devices
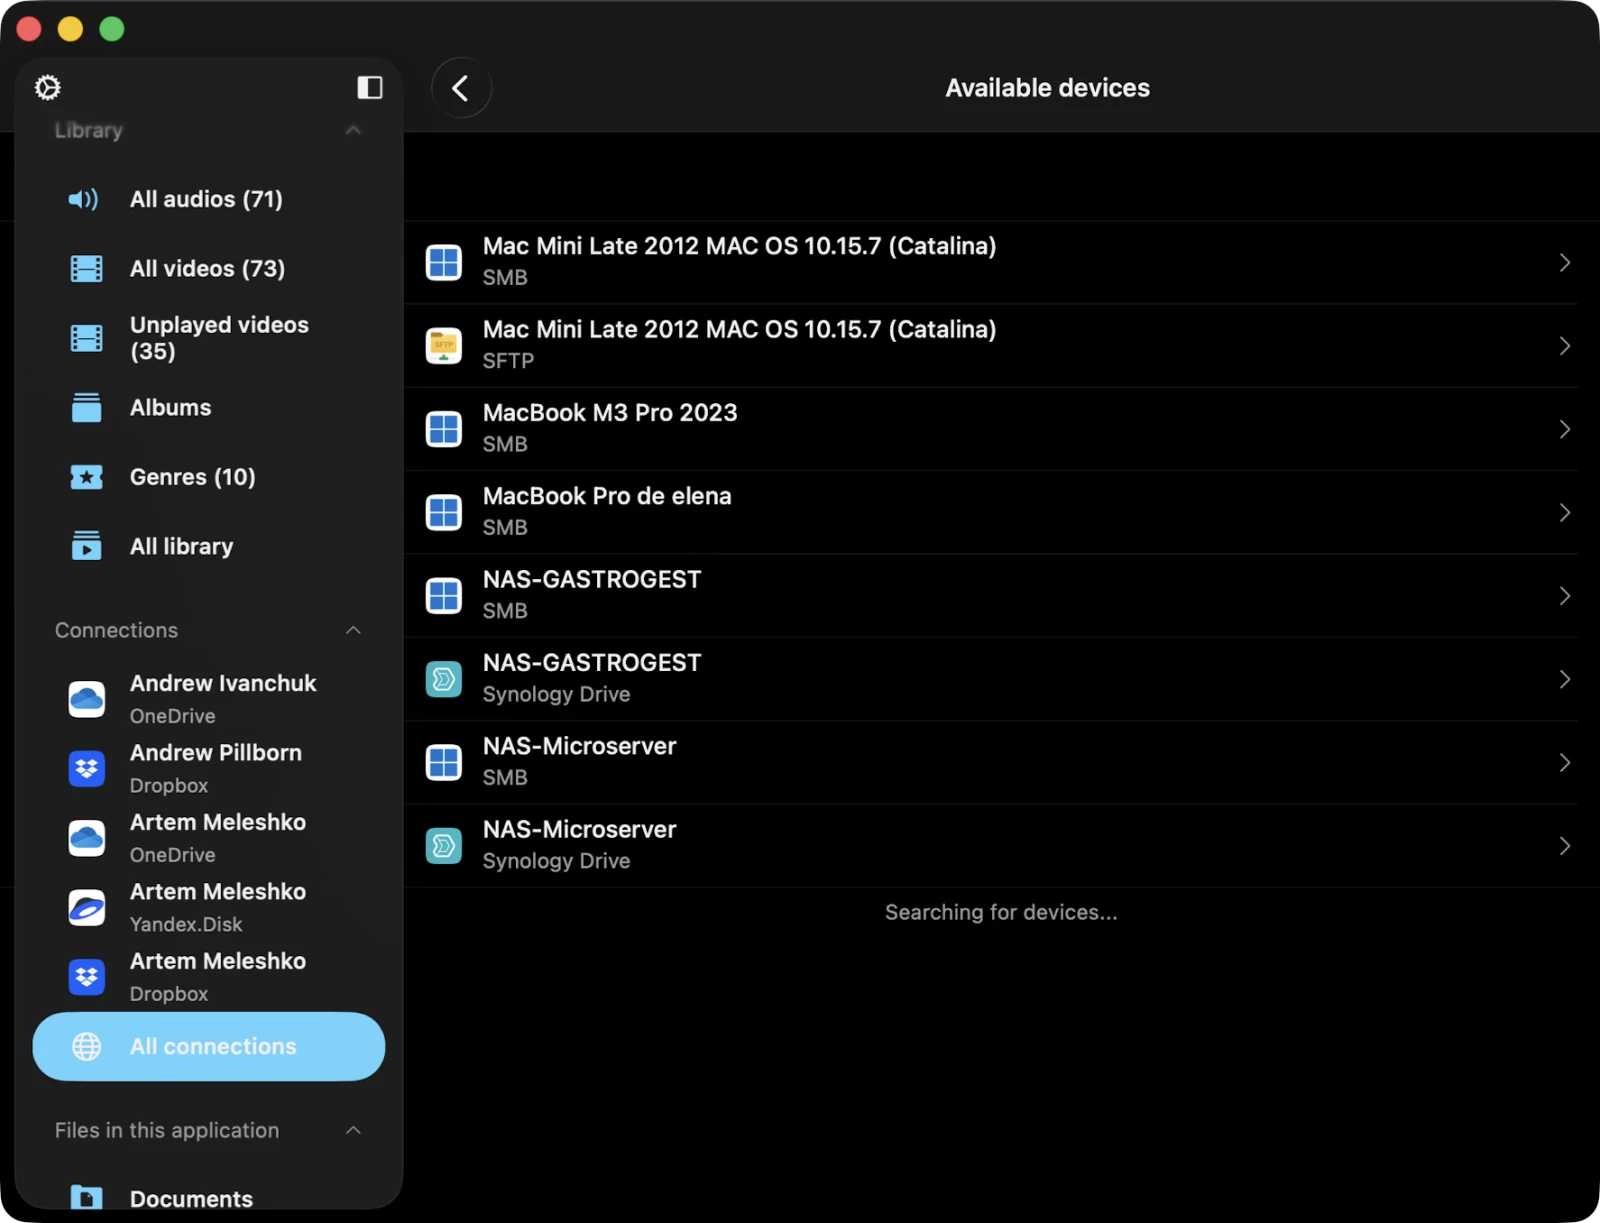
This section displays every device on your local network that you can connect to from Evervideo via Bonjour / mDNS discovery — Plex, Jellyfin, Emby servers, Synology, QNAP, AirPort routers with attached drives, Apple Time Capsule, and so on. To establish a connection:
- Scroll to the Available Devices section in the Files tab.
- Tap the device you want to connect to.
- If needed, enter your login details to complete the connection.
Wi-Fi Drive
Wi-Fi Drive lets you transfer files wirelessly from your computer to your iOS device via any desktop browser, Finder, or File Explorer. Your device and computer must be on the same Wi-Fi network.
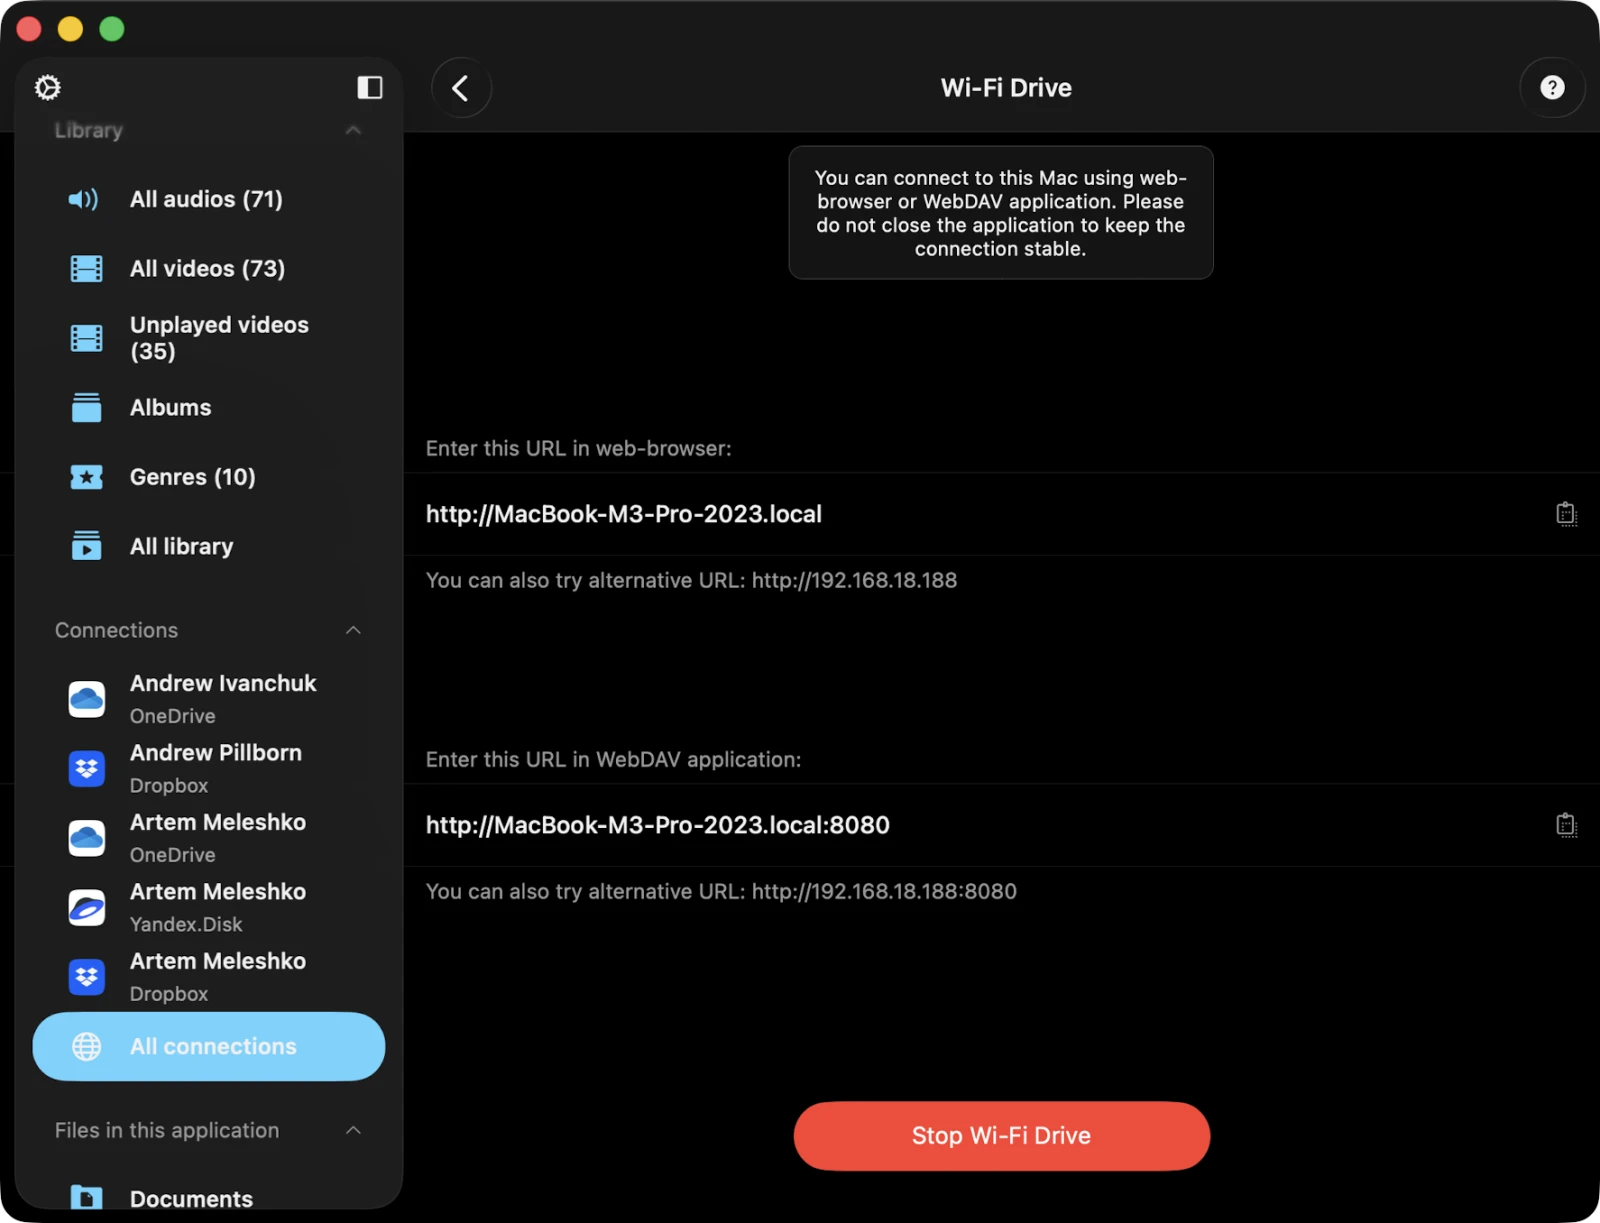
Enable Wi-Fi Drive
- In the Files tab, scroll to Cloud Storage → Connect via Wi-Fi to open the Wi-Fi Drive main screen.
- (Optional) Set a username and password for the embedded web server.
- Tap Start Wi-Fi Drive.
Access Wi-Fi Drive on Your Computer
- Open a web browser on your computer (Chrome, Firefox, Safari, etc.).
- Enter the URL shown by the application.
- Drag and drop files from your computer onto the web page — they’ll begin transferring to your iOS device.
You can also mount Wi-Fi Drive directly in Finder on macOS (Go → Connect to Server…) or File Explorer on Windows (Map Network Drive…) and treat your iPhone or iPad as a regular network drive.
Detailed instructions are available here.
iTunes / Finder File Sharing
iTunes File Sharing (now Finder File Sharing on macOS Catalina and later) lets you transfer files using a Lightning or USB-C cable. Connect the device, open Finder on Mac (or iTunes on Windows), find Evervideo in the apps list, and copy files into its shared folder.
Connect a USB Flash Drive or SD Card
Plug a USB drive or SD card into your iPhone, iPad, or Mac via the Lightning-to-USB / USB-C adapter or card reader. Open Files → Files on This iPhone → Open Folder, navigate to the drive, and pick a video file or folder. Evervideo plays files directly from the drive without copying them to internal storage — handy for very large 4K libraries.
Folder Browsing in Connected Storages
Tap any connected cloud service to open its file browser. Folders show video thumbnails when available, and tapping a video starts playback immediately while continuing to stream the rest of the file in the background.
Quick Access
The Quick Access section sits at the top of the Files tab. It gives you fast access to your favorite and recently opened files and folders — both from cloud services and from on-device storage. Whenever you open a file or folder from the cloud, it’s added to the Recently Opened list. You can mark deeply nested folders as Favorites to access them quickly without digging through the directory structure.
Files in This Application
This section shows files and folders stored in Evervideo’s sandboxed Documents directory — everything you’ve downloaded from the cloud, transferred via Wi-Fi Drive, copied through Finder File Sharing, or imported from another app.
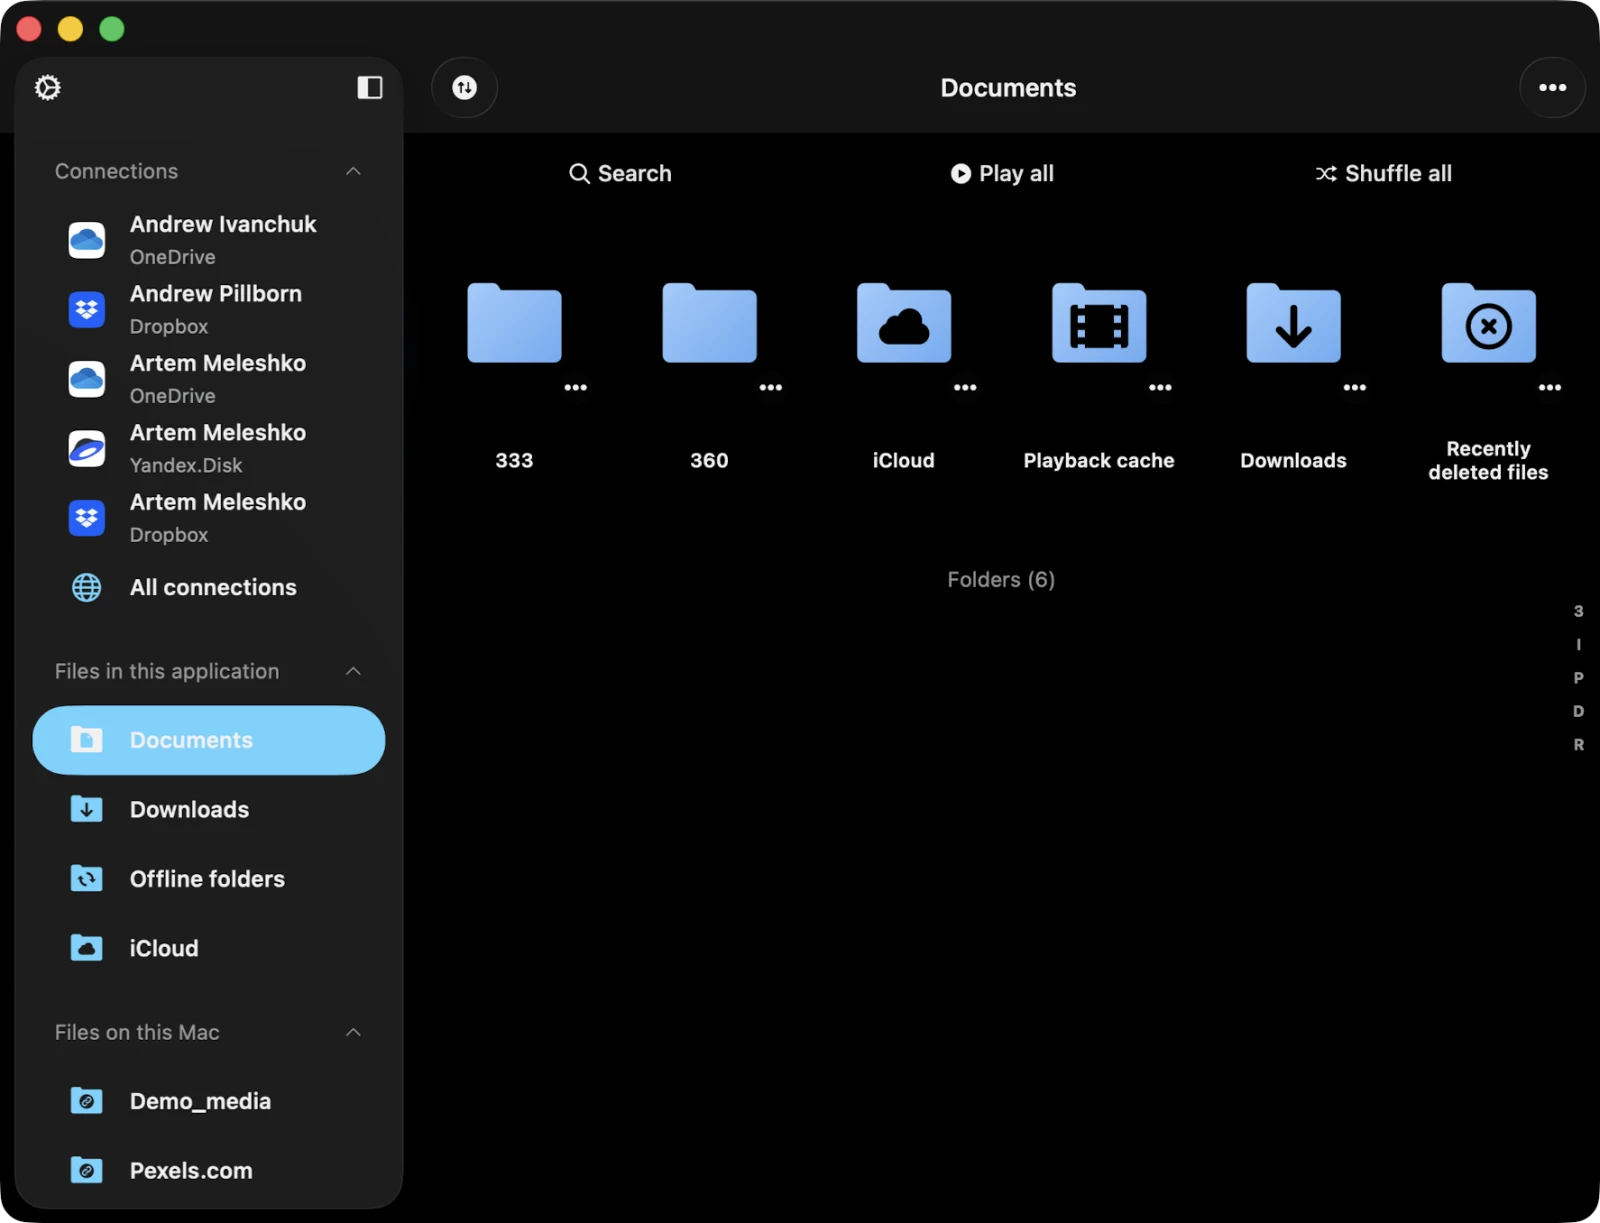
Documents Folder
The Documents folder is the root of everything inside Files in This Application. You can create subfolders, rename files, move them around, and group them however you like.
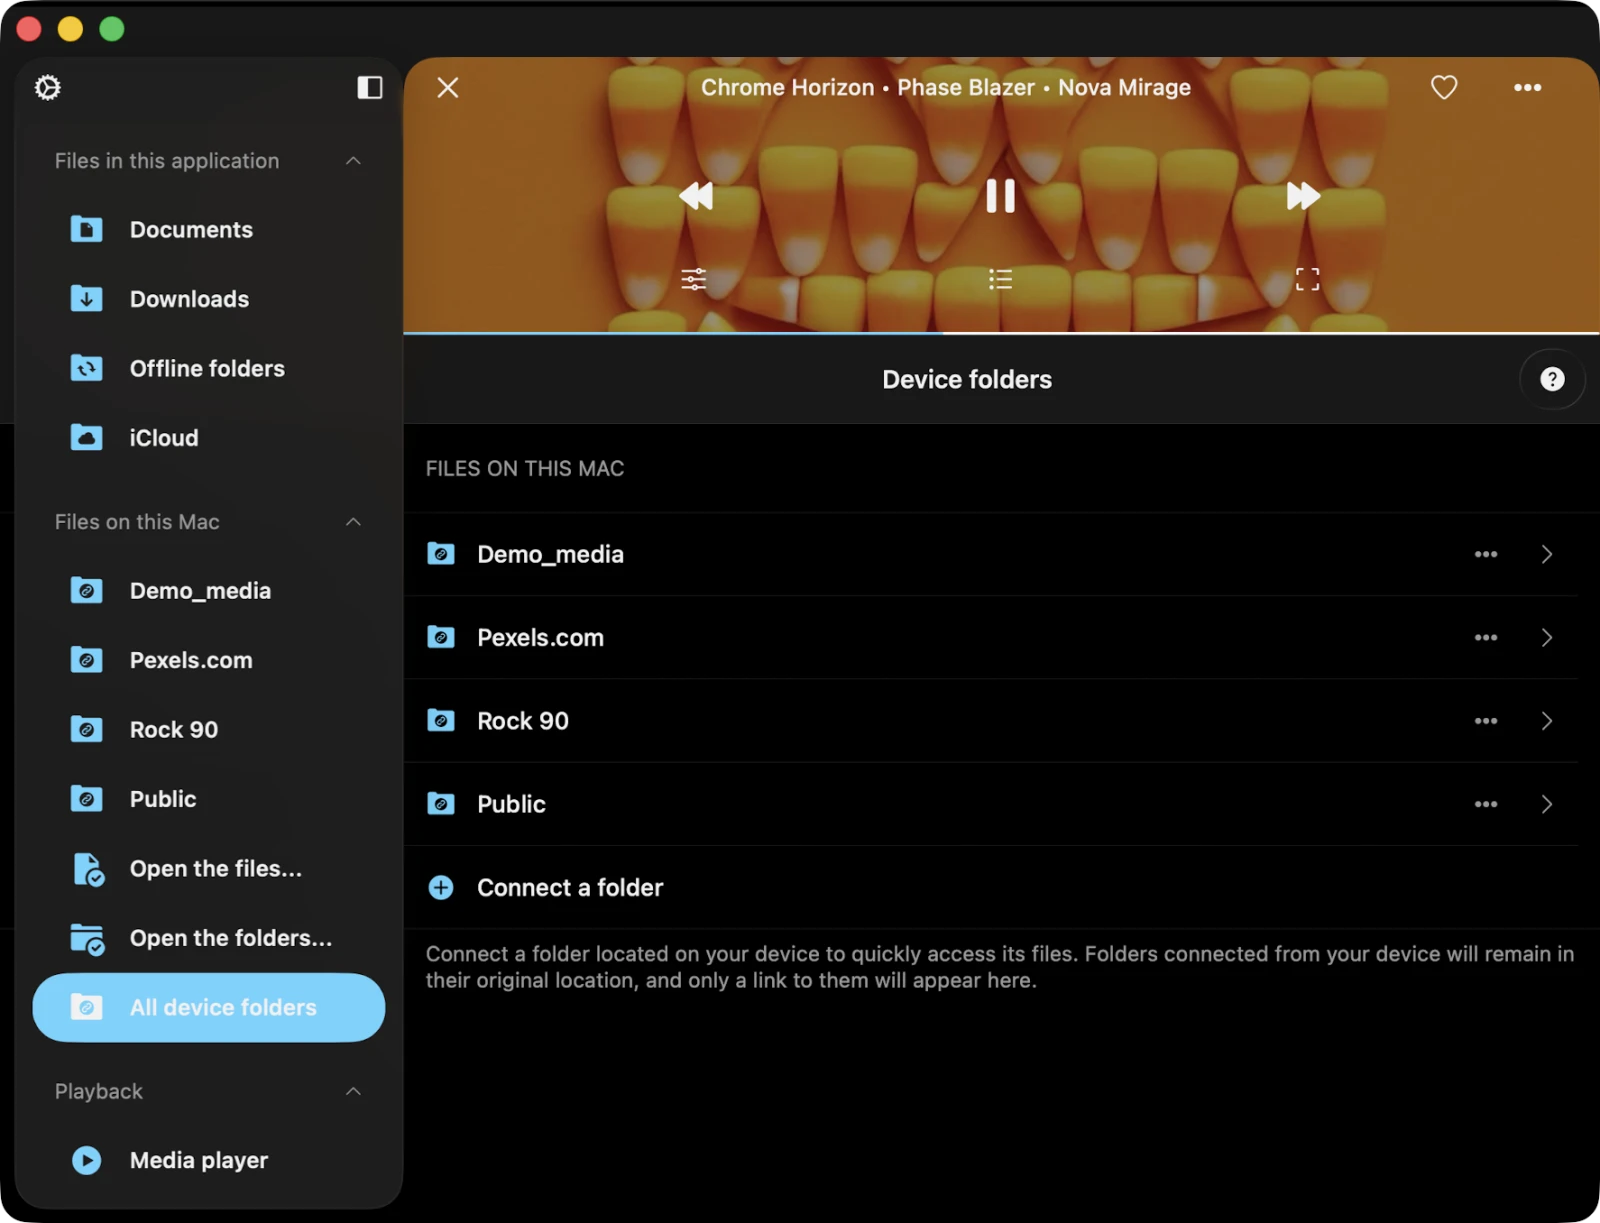
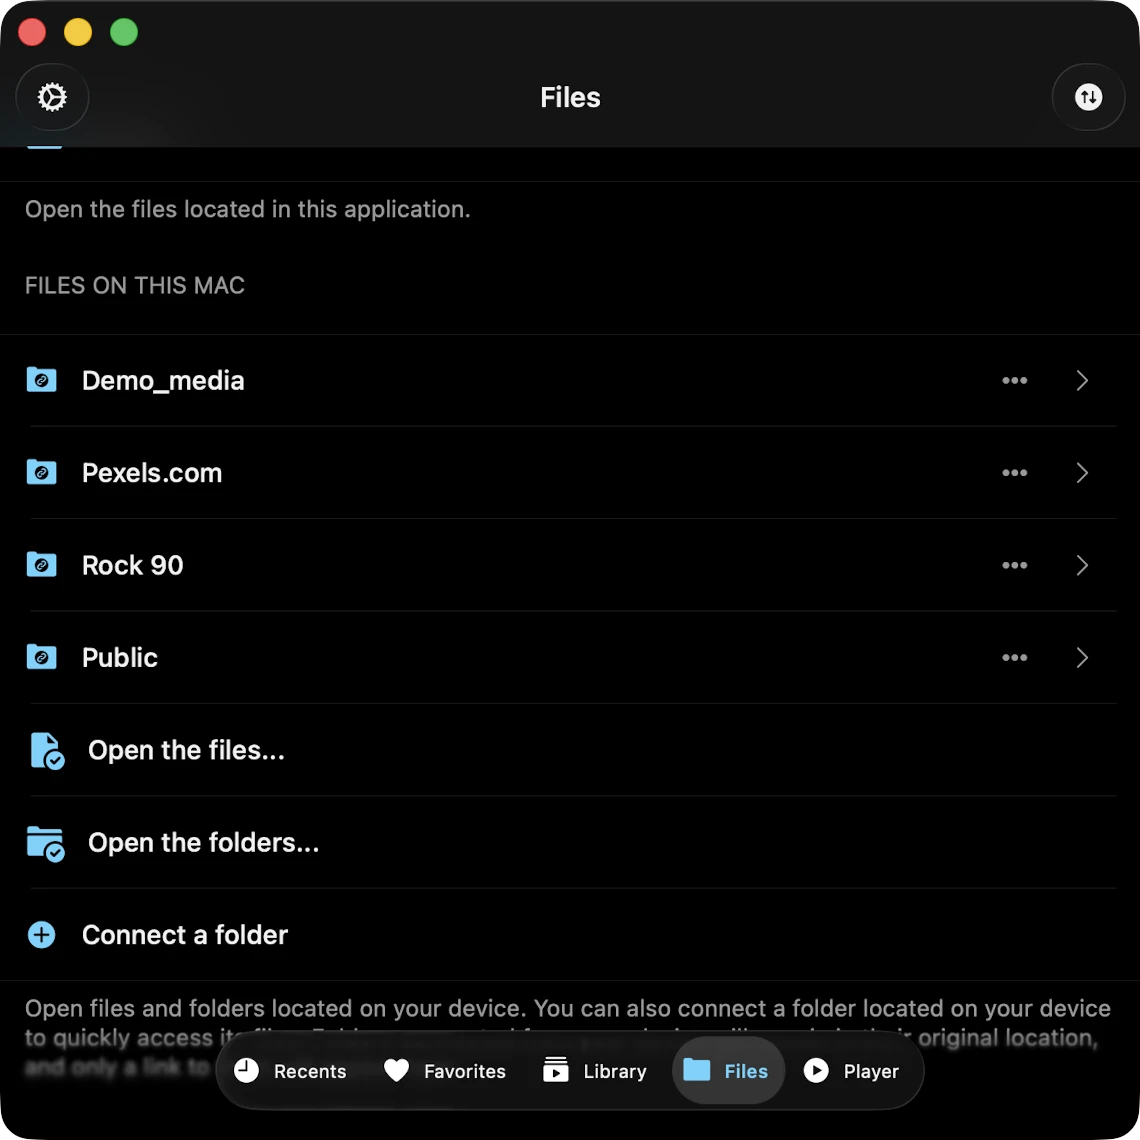
Files on This iPhone / iPad / Mac
This section shows videos located on your device but in different applications. You can import them into Evervideo using the system file picker:
- Tap Open Files… to select specific files.
- Tap Open Folder… to select a whole folder.
You can also use Connect a Folder to create a link to a folder on your device with read / write access — perfect for working with a folder on iCloud Drive or an attached USB drive without copying anything.
Special Folders
Within the Files tab you’ll see several special folders that Evervideo creates and uses automatically:
- Downloads — every file downloaded from the cloud appears here by default. Customize in Settings → File Manager → Save Downloaded Files To.
- Player Cache — the media player cache. By default the player downloads upcoming videos for smooth playback. You can disable the cache in app settings or simply delete this folder.
- iCloud — files in this folder sync across all your devices connected to the same iCloud account.
- Offline Folders — when you mark a folder, playlist, album, or genre as available offline, the files are downloaded into this folder.
Top Toolbar
The top toolbar, located under the navigation bar, offers several actions you can show or hide with a swipe-down gesture:
- Search — perform a search within the current folder or section.
- Continue Playback — if enabled in settings, restore the player queue and last video position for the current folder.
- Play All — scan the current folder and its subfolders and add files to the player queue.
- Shuffle All — like Play All, but shuffles before adding.
Folder Options
When you open a folder, tap the "…" button in the top-right corner for these actions:
- Select — activate file-selection mode.
- New Folder — create a new folder within the current folder.
- Enable Offline Mode — turn on offline sync for the current folder. New files added online are downloaded automatically.
- Upload Files — upload files from your device to the online folder.
- Search — search within the folder.
- Sort — sort files by name, size, date modified, or metadata.
- Grid / List View — switch between table view and thumbnail view. Thumbnail view shows large video poster previews.
Selection Mode
Tap "…" in the top-right corner and choose Select to enter selection mode. Checkboxes appear next to every file and folder. Tap to select one or several items, then perform batch actions: Play Next, Play Later, Add to Media Library, Add to a Playlist, Copy, Upload, Move, Rename, or Delete.

If you’d rather treat connected cloud storage as read-only (to prevent accidental deletions), enable Settings → File Manager → Edit Online Files → Off to hide all destructive operations from the UI.
File Actions
Tap the "…" icon near a file’s title to reveal its actions menu:
- Play Next — insert the file at the top of the player queue.
- Play Later — append the file to the bottom of the player queue.
- Add to Media Library — incorporate the file into your media library, organized by Album and Genre.
- Add to a Playlist — add the file to an existing playlist or create a new one.
- Edit Tags — open the built-in tag editor to modify metadata. For online files, the file is temporarily downloaded, edited, and then re-uploaded after you confirm.
- Add to Favorites — add the file to your favorites list for quick access.
- Download — download the file or folder to your device for offline use.
- Rename — rename the file directly on the remote storage.
- Move — relocate the file to a different folder within your cloud storage.
- Add to Archive — bundle the file into a single ZIP file (Premium feature).
- Open In — export the file to another compatible app via the system Share sheet.
- Delete — permanently remove the file. This action cannot be undone.
Folder Actions
For each folder in your cloud storage, you have many actions available by tapping the "…" icon next to the folder title.
- Play All — replace the current player queue with every video in the folder.
- Play Next / Play Later — add the entire folder to the queue.
- Add to Media Library — incorporate the folder’s content into your media library.
- Add to Playlist — add the entire folder to a playlist.
- Add to Favorites — add the folder to your favorites.
- Enable Offline Mode — beyond a simple download, this continuously monitors the folder for new files and auto-downloads them as they appear online.
- Download — download all contents of the folder to your device for offline access.
- Rename / Move — rename or relocate the folder on remote storage.
- Add to Archive — bundle the folder contents into a ZIP file (Premium feature).
- Delete — permanently remove the folder and its contents. This action cannot be undone.
Transfers Queue
In the top-right corner of the Files tab is a Transfers button (a spinning-arrows icon). Tap it to open the Transfers Queue — a list of every active download and upload across all of your sources, with real-time progress, speed, and ETA per file.
You can pause, resume, retry failed transfers, rearrange items to prioritize specific downloads, or cancel them individually. You can also adjust the transfer queue speed (maximum parallel tasks), network type (Wi-Fi only or Wi-Fi + Cellular), and background transfers in Settings → File Manager.
Offline Mode and Synchronized Offline Folders
Offline mode is a handy feature that lets you watch your favorite videos even when you’re not connected to the internet. When you enable offline mode for any folder, playlist, album, or genre, all files within that collection are automatically downloaded to your device for offline playback. They appear in the Offline Folders section.
When you add new files to the remote server, they’re also automatically downloaded — so your offline collection stays current without you doing anything. To manually re-sync, tap the three dots in the top-right corner of an offline folder and select Synchronize.
You can adjust the synchronization timeout in Settings → File Manager → Synchronized Offline Folders → Time Interval.
Detailed instructions are available here.
Personalization
In Settings → Personalization you can configure how the Files tab is presented:
- Files Screen Style — Plain Menu (shows the folder list directly) or Grouped Menu (groups content by category — Quick Access, Special Folders, Cloud Storage, etc.).